
So up until now the panels have all been kept a little oversize. I lucked out and was able to get a set of templates for the finished dimensions of the parts manufactured on a CNC machine.
 |
| A Single 4x8 sheet of 1/2" MDF held all the Templates |
 |
| Templates Ready to Go |
The templates are attached to the oversize parts using double sided tape. Once the parts have been matched to the templates they are at their finished dimensions. However, an allowance for the addition of solid wood edging needed to be made. The full size parts were profiled with a 1/8" rabbeting bit and then matched to the reduced dimension, this leaves room for 1/8" thick edging.
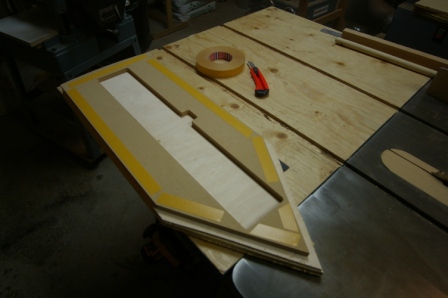 |
| Double Sided Tape on the Template |
 |
| Bearing Bit to allow for Pattern Matching |
 |
| All the panels Ready to go |
 |
| A Mountain of Sawdust from the Patten Routing |
The edging is added in stages so that one joint can be matched to the next. The overhang from the first peices is trimmed flush witht he adjoining edge and then the next piece can be added. Regular masking tape is used to clamp the edging in place. As it is applied it is stretched to privide pressure.
 |
| Center Star with Edging in Progress |
 |
| A Stack of Partially Edged Components |
Not everything always goes as planned, one of the pie wedge components had a portion of the curved edging delaminate. To fix the problem the old glue was cleaned out of the joint, new glue added and a bar clamp to apply more pressure to make sure it takes hold.
 |
| Fixing the Delaminated Edging |
 |
| Use of a Block to Prevent Marring the Surface |
No comments:
Post a Comment