I have been interested in timber framing for a couple of years now, after waiting for the right time I have found the opportunity in my schedule (due to a supportive wife and a boss who is generous with time off) to pursue the interest full time for a month. I am taking a course at the
Island School of Building Arts on Gabriola Island under the instruction of James Mitchell. The School has a large lumber / assembly yard, and a gorgeous shop made of large log posts. We've had two days so far and are into cutting our joinery already.
 |
| The Workshop |
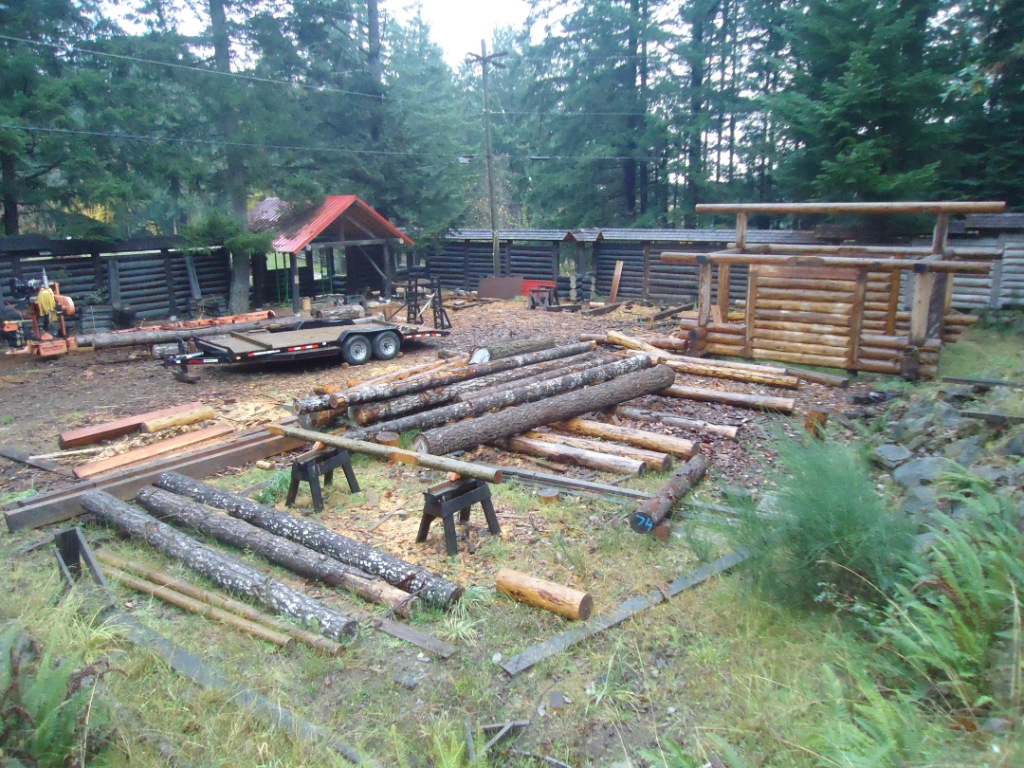
 |
| The Assembly yard. |
 |
| The workshop with timbers set out for joinery. |
The morning of day one comprised of an overview of the project, and lofting the plans. The project we plan to build is a pair of hammer bent trusses which will span 20 feet and associated girts and purlins to build the skeleton of a building. Lofting is a full scale drawing of the plans on the shop floor to work out any details that may be needed. The process starts with laying out control points down the center of all the beams we will use and connecting those to make a wire frame drawing of the structure. This is then flushed out with drawing in the full size timbers and finally a full set of joinery is drawn in. It goes remarkably fast, I think because the drawings are full size and it is intuitive to most people what to draw next each step of the way.
 |
| A hammer bent built by a previous class. |
 |
| Lofting the bent on the shop floor. |
 |
| Full scale joinery layout and templates. |
In the afternoon we built a parts list for all our frame components and checked that against the stack of timber by the shop. Each of the member of the class chose a component to start working on and retrieved the timber from the stash. We cleaned up the timber and proceeded to scuff plane (a rough cleaning) the timbers to allow easier marking and handling. All in all a fun first day. Of course getting to visit the West Coast Islands and working with big timbers I don't know how I wouldn't have had fun.
 |
| Scuff Planing the timber. |
Day two we started with lay out. The convention used here is a center line layout technique. This more easily accommodates irregular work pieces. The timber is leveled off and a series of control lines are drawn on the timbers against which the joinery will be referenced. Once this is done the time comes to lay out the joinery for each individual piece. I'm working on a principal post which requires a sloped shouldered tenon on the top, a mortise for the hammer girt and a mortise for the connecting girt. In time it will also receive a mortise for a knee brace but that will be done after an initial test fitting. By the end of the day (after a series of corrections to initial layout) I was able to start cutting the tenon. Using the biggest circular saw I've ever held. The saw is a Mafell 16" circ saw and runs off 220v power. A truly impressive beast.
 |
| Center Line Layout Reference Lines |
 |
| Joinery is laid out and ready to start cutting. |
 |
| Using the 16" circular saw. |
 |
| The "little" 10" circular saw is set to the depth of the tenon cheeks. |
I'll try to keep everyone posted as the work comes along.
Hope you're all having as much fun as I am.
I can't wait to get out of bed tomorrow!


Neighbour Matt, neighbour Jeff here. Thanks for the cool overview. You're missed here, but we're all excited to see what you'll learn about wood, about building and about your own life as you go through this cool experience. Enjoy the big saw.
ReplyDeleteI wish I could have a house made in timber, I really like wood houses but my construction materials supplier suggest we go with modern design because my budget can even buy a timber haha
ReplyDelete